
Part deux in the saga of finding an easy, deconstructable portable booth, that, for most purposes, I just wanted to leave up and in the same spot!
Ok, I admit the other spray booth was quick and had it's issues, like I couldn't close the garage door without having to take it down. But hey, what do you want for $20! I kept the clothes pins though, for use in the new version.
This new version involves PVC pipe and joints, and the cheapest shower curtains and rings you can find. There are some cuts you will have to make to the pipe of course, but perhaps if you don't have a chop saw, you can convince some really nice guy at Home Depot to do them, but there are quite a few.
The reason my booth is this size reminds me of the story about the woman who was always cutting off the ends of the roast before she cooked it.
Her husband upon observing that she was wasting meat asked, "Why do you cut off the ends of the roast, honey?"
She replied, "Because that is how my Mother did it!!"
The next time the man's Mother-in-law came to the house, he asked her, "Why do you cut off the ends of the roast?"
She replied, "Well, I cut them off to fit it in my pan!"
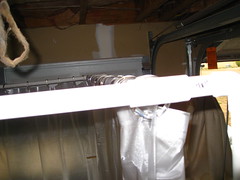
It is this size because that is how much room I have in the garage that doesn't get in the way of Eric's woodshop.
So, you may want to make it bigger if you paint larger items, but I'm finding for me, this seems to work pretty well. The good thing is, though, I didn't glue the joints, so that I could take apart, which leaves me the option of making the booth deeper if I need to!
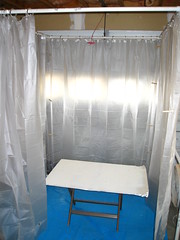
My booth is about 5 feet wide and deep by about 7 feet tall.
Basic How-to:
Your booth will be constructed of two sides (identical rectangles of any size) secured with corner elbow joints. Then you will join them together with struts on the top and sides. That's it!
Lay out the rectangles where you have space, like the driveway!
Decide where you want the struts to be and cut your pipes into two sections, but be sure to make the identical cut on the other rectangle (opposite side of the booth), so you can add your strut! Join the two pieces using a T joint. Now you add the strut!
For extra support, you can add struts anwhere! Again, follow the same rule as above: Put T joints anywhere in your booth by cutting any length of pipe, on top and bottom of the booth, or side to side. Then join the two lengths with the T joint and throw in a strut! Easy peasy!
Put everything together. Glue is optional. I don't use it because I want to take it apart! Once you have everything together, add shower curtain rings to three sides and follow with the curtains! Secure the corner seams with clothespins. Place a dropcloth on the floor of your booth before spraying! Have fun!
materials
1.5" pvc pipe, about 10-12 (you can use thicker or thinner pvc depending on the size of your booth
1 pack of T joints, 6-10
8 pvc elbows
3 sets of shower curtain rings
3 shower curtain liners
1 drop cloth
Total cost under $40

DIY Spray Booth, Part Deux
 New Smelly Rhino Black and White logo
 A new print available ready to frame or as a greeting card.

 I know I am on the right path now.


